Root Meridian Part 7: Solving Problems That Do Not Exist Yet
Last post I built a cardboard octagon to avoid opening Fusion 360. This session I got a personal Fusion 360 license, opened the software, and immediately spent most of the time researching questions that have nothing to do with extruding an octagon.
Different flavor of the same avoidance. Apparently I contain multitudes.
In my defense, the questions are real. They just don’t need to be answered yet.
The Custom PCB Rabbit Hole
When you search “ESP32 enclosure Fusion 360” you start seeing people talk about custom PCBs. I didn’t know what that meant in practice so I went and found out.
Your current electronics stack is a collection of breakout boards — the HUZZAH32, the stepper driver, the DFPlayer — each one a small PCB that someone else designed, all connected together with jumper wires. A custom PCB replaces all of that: you design one board, the ESP32 module solders directly to it, the stepper driver circuit lives on it as copper traces, and your jumper wires become traces you drew yourself. The board is exactly the size and shape you need.
People reach for custom PCBs when size is genuinely tight, when they’re making more than one unit and hand-wiring is becoming a problem, or when they want the finished thing to look like a product instead of a prototype. At even ten units, hand-wiring breakout boards is miserable. At fifty it’s impossible.
For Root Meridian — one prop, first print, still figuring out if the cardboard dimensions were even right — it’s not the move. Good to know it exists. Moving on.
The SD Card Panel Mount Tangent
Here’s the thing about the DFPlayer: it has an SD card slot for the audio files. That card lives inside the enclosure. If you want to swap audio files, you have to open the enclosure to get at it.
Except you don’t have to design it that way. There are panel-mount SD card extension cables — a short ribbon that connects the DFPlayer’s card slot to a socket mounted flush in the wall of the enclosure. Design a rectangular cutout, snap in the socket, done. Same idea as routing the USB charging port to the outside.
The question is whether it’s worth it. For a prop where the audio files are loaded once and basically never change — probably not, especially since the lid has to come off for battery access anyway, so the card is accessible whenever you need it. For a version of this that other people own and need to update without opening the enclosure, absolutely yes.
I spent a not-insignificant amount of time thinking about whether other dungeon masters would ever want to buy one of these.
The answer is: I don’t know, and I definitely can’t know until I’ve finished one and put it on a real table at a real session and watched what happens. Maybe it’s a beloved prop. Maybe it’s a very well-engineered paperweight. Either outcome is fine. The product decisions — panel-mount SD, custom PCB, battery access UX — those all go in a drawer labeled “after playtesting” and stay there.
The Problem Worth Actually Thinking About
Here’s where the session got productive: I started thinking about what makes a handmade prop feel cheap when you pick it up, and the answer is almost always the same thing. Not the boards. Not the enclosure finish. Loose wires.
A board that’s mounted doesn’t move. A wire with 40mm of slack between two points will find something to tap against every time the prop gets picked up, and that sound is exactly what makes a project feel unfinished. The rattling isn’t structural failure — it’s just wire flop.
The fix is wire routing: small channels or clips built into the interior walls that give each wire a defined path and no slack to bounce around in. You don’t design all of these up front, because you can’t know exactly where the wires run until you’ve done a first assembly. But knowing they’ll need to exist means you leave enough wall thickness to add them in a revision instead of discovering on version one that there’s nowhere to put them.
The mounting priority for keeping things solid once they’re in:
The stepper motor is the heaviest part and produces the most vibration — it needs to be the most rigidly attached. The NEMA 17 standard mounting holes are there for exactly this reason.
The ESP32 HUZZAH32 has four M2 mounting holes. Heat-set brass inserts in the printed standoffs, M2 screws through the board, done.
The battery should sit in a pocket that’s a few millimeters larger than the battery on all sides, held by a velcro strap threaded through two small printed tabs. Not because of thermal expansion exactly — more because LiPo batteries can swell when they age or get overdischarged, and a battery in a tight pocket with nowhere to expand is a problem. The velcro strap is everywhere in the RC car world and it’s the right call.
The small boards — the stepper driver and the DFPlayer — have no mounting holes. The standard approach is PCB edge clips: a pocket in the wall that’s exactly board-width plus about 0.2mm clearance, with a small printed lip that holds the board from above. The board slides in from one side, the lip snaps over the edge. Removable, no hardware, fully printable.
What Any Of This Has To Do With The Model I Haven’t Made
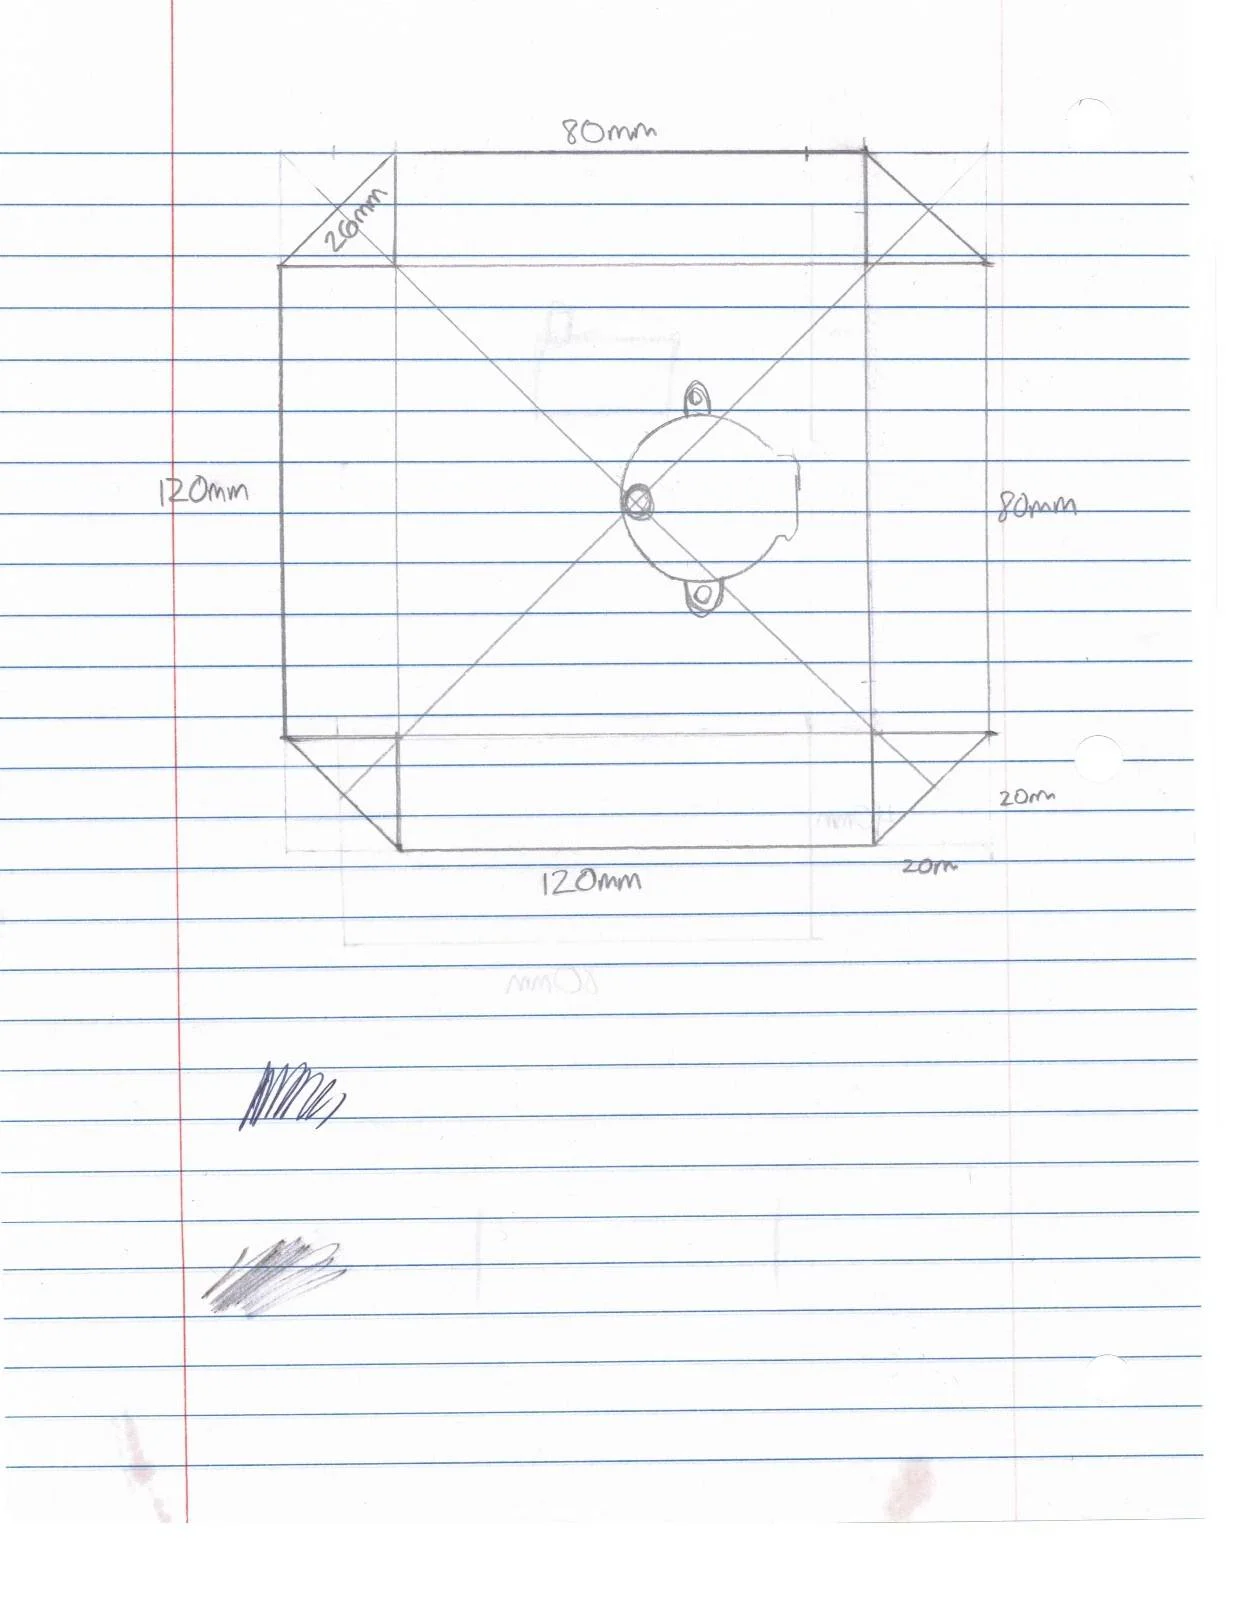
The geometry is locked. 120mm square, 45-degree chamfers, 80mm cardinal faces driven by the speaker footprint, 40mm height for the 32mm speaker body plus floor and ceiling. That part hasn’t changed.
The mounting research actually does feed into the model — knowing I need standoffs for the ESP32, a cross-brace for the motor, a velcro strap pocket for the battery, and clip pockets for the small boards tells me what interior features to design. That’s not nothing.
But the honest accounting of this session is: I opened Fusion 360, confirmed the sketch constraints, watched some tutorials on extrusions and planes, and spent the rest of the time thinking about a product I haven’t built yet.
First print is a fit test. The rattling problem, the SD card access problem, the wire routing problem — none of those exist until there’s a physical enclosure to put parts into. Build the box first. Find the real problems. Solve those.
Cardboard octagon: built to avoid Fusion 360. Custom PCB research: conducted to avoid extruding the octagon. At some point the octagon is going to get extruded and I’m going to run out of ways to prepare for it.