Root Meridian Part 5: First Solder, First Light
I have never soldered anything in my life.
That changed this morning. The Pinecil V2 arrived a few sessions back and I’d been putting off using it — not because I was scared exactly, but because I knew the NeoPixel ring was the most visually impactful part of this whole build, and I didn’t want to ruin it with bad joints on my first attempt. At some point you just have to heat the iron.
Here’s how it went.
The Setup
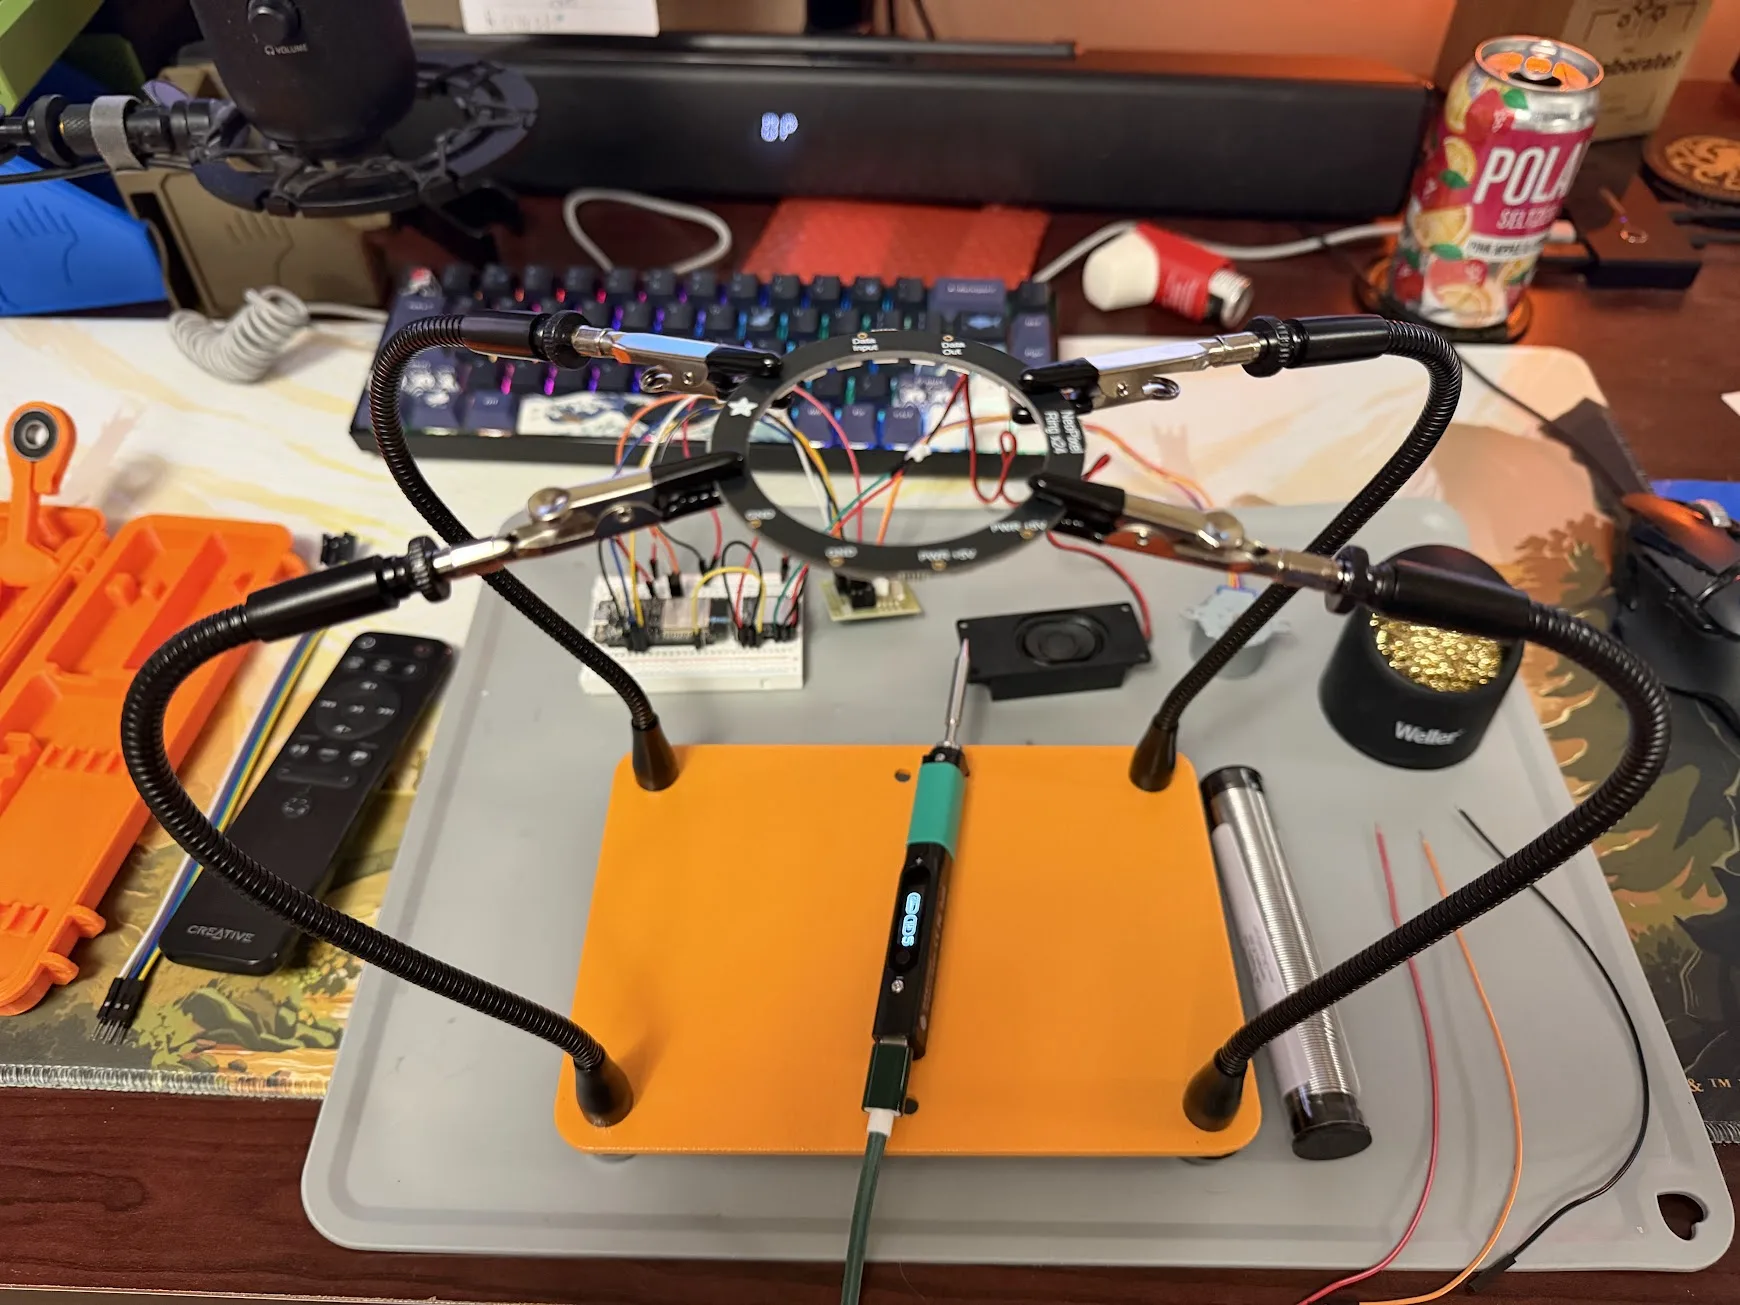
The tools I had going in:
- Pinecil V2 — temperature-controlled USB-C iron, highly regarded for learning
- Kester “44” 63/37 0.031“ solder — leaded, flux-cored
- Nokorode paste flux — picked this up at Lowe’s thinking I’d need it
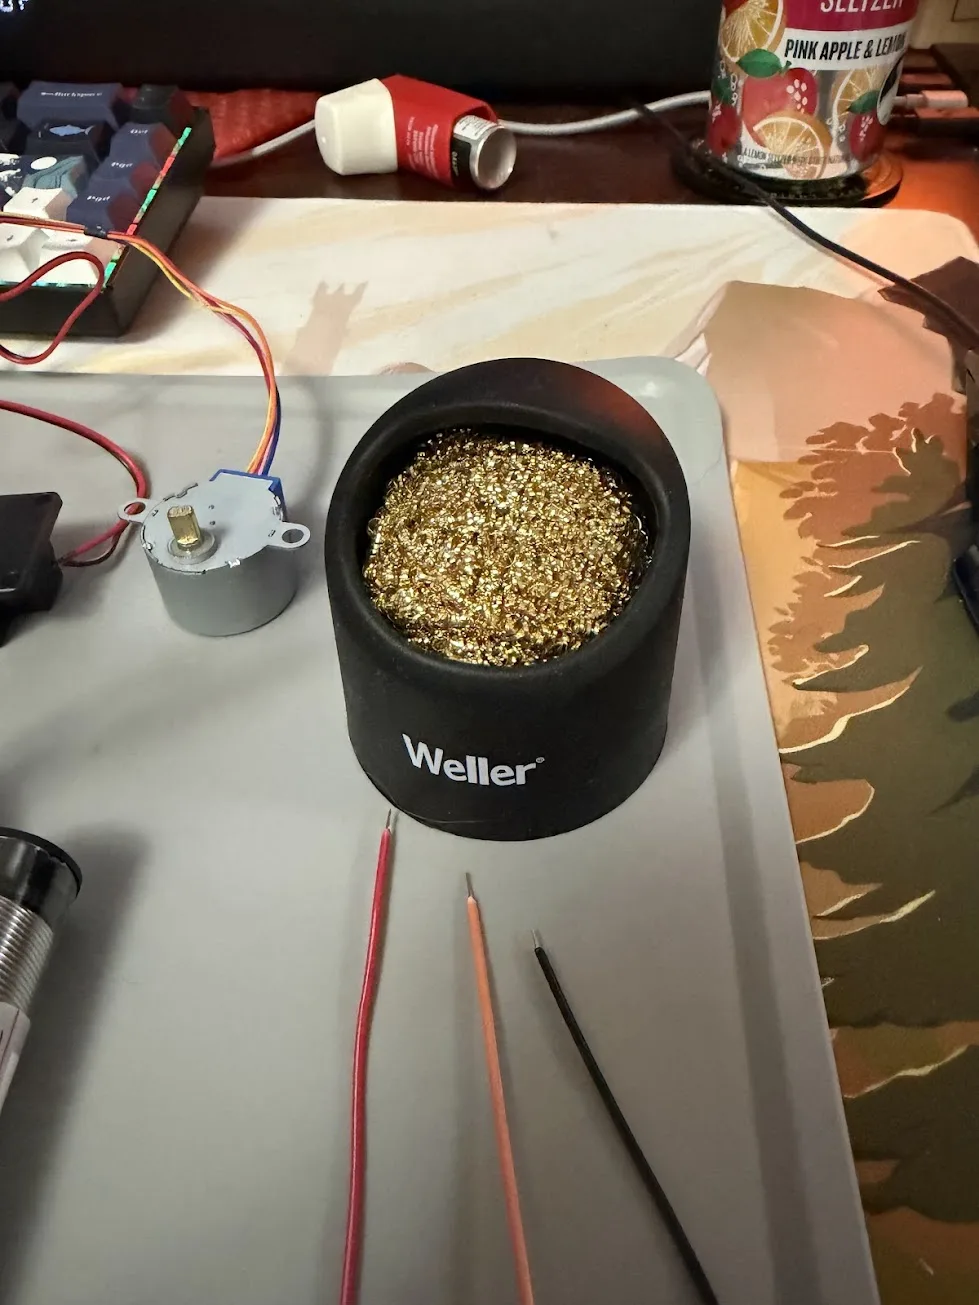
- Weller brass sponge tip cleaner
- Helping hands — four-arm PCB holder with weighted base
The Kester 44 is genuinely good solder. 63/37 is a eutectic alloy — it goes from solid to fully liquid at exactly 183°C with no mushy in-between phase, which makes it much more forgiving to learn on than lead-free. A lot of hobbyists use it for years.
The Nokorode paste flux turned out to be the wrong thing entirely. It’s plumbing flux — more chemically aggressive than electronics work needs, and it leaves corrosive residue on PCBs. The Kester 44 already has rosin flux built into the core of the wire. As the solder melts, the flux flows out ahead of it and cleans the joint automatically. No paste needed.
Thermal Runaway on First Boot
Plugged in the Pinecil, selected 330°C (right for leaded solder), and immediately got a THERMAL RUNAWAY error. The iron shut itself off.
Thermal runaway means the iron heated faster than the temperature sensor expected — it reads that as a runaway condition and shuts down for safety. It’s usually not a hardware fault. Two things can cause it: a loose tip that isn’t making good contact with the heating element, or the wrong tip profile selected in settings.
I reseated the tip firmly and tried again. It came up clean, hit temp in about 30 seconds, and stayed stable.
Lesson: always firmly seat the tip before powering on.
Three Connections
The NeoPixel ring has four pads labeled on the PCB: two PWR +5V, two GND, one Data Input, one Data Out. The duplicates are just for daisy-chaining multiple rings — both 5V holes connect to the same trace, both GNDs are the same ground. With a single ring you pick one of each and leave Data Out unconnected.
The three connections I needed:
NeoPixel Ring          ESP32 HUZZAH32
─────────────          ──────────────
PWR +5V      ────────  USB / VBUS (5V rail)
GND          ────────  GND
Data Input   ────────  GPIO 14
I used Dupont jumper wires from the Elegoo kit — 26 AWG stranded, which is exactly the right gauge for this. I’d considered soldering the Dupont pin end directly into the pad, but that would mean soldering through a crimp joint I didn’t make, and the plastic housing would deform if the iron got near it. The right approach: pull the pin housing off, cut the crimp, strip 5mm of fresh wire.
The Technique
The iron tip needs to be tinned before use — melt a small amount of solder onto the tip, wipe it on the brass wool, repeat until it comes out shiny silver. A shiny tip transfers heat. A dark, oxidized tip doesn’t.
The rule I kept reminding myself: heat the joint, not the solder. Touch the iron to the pad and the wire together, wait a beat for them to get hot, then touch the solder to the joint — not to the iron. The solder should flow toward the heat. If you melt solder onto the tip and drag it to the pad, you get a cold joint: structurally weak, electrically unreliable, dull gray instead of shiny.
The process for each connection:
- Strip and tin the wire end — melt a little solder into the strands, wipe clean
- Tin the pad — touch the iron to the pad, flow a thin layer of solder onto it
- Hold the tinned wire to the tinned pad, touch the iron briefly — the two pools merge and reflow together
- Remove the iron, don’t move anything for 2–3 seconds while it solidifies
Pre-tinning both surfaces first makes the actual join almost trivial. The iron is on the joint for maybe 1.5 seconds.
The First Boot With LEDs
Three wires soldered. Plugged the ESP32 back in. Serial monitor came up:
=== ROOT MERIDIAN ===
[528ms] LEDs ready
[529ms] Motor ready
[1491ms] DFPlayer ready
[1492ms] Connecting to WiFi...
[WiFi] Connected — IP: 192.168.87.85
[3081ms] HTTP server ready on port 80
And the ring lit up.
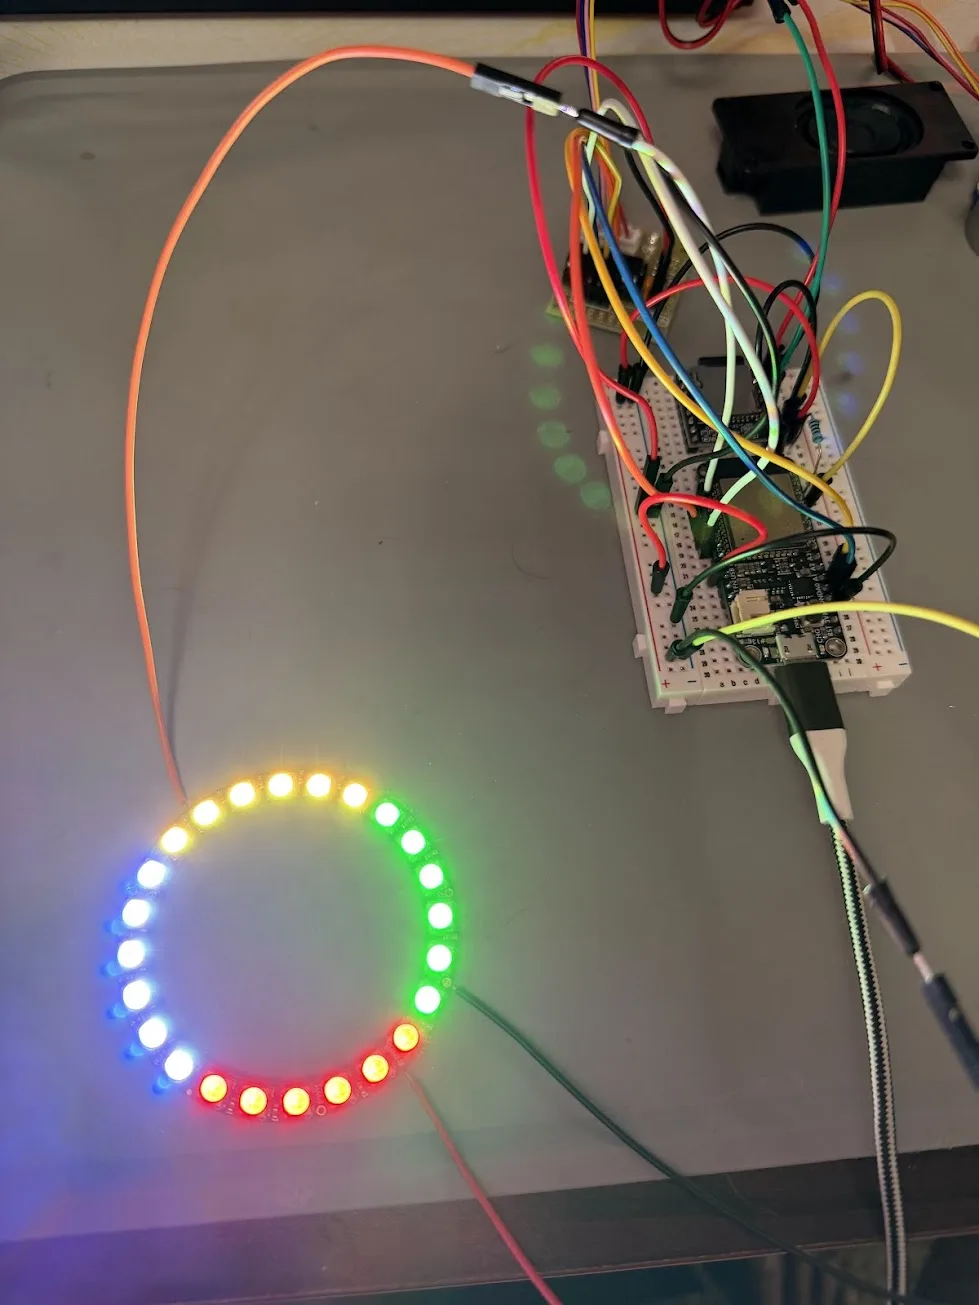
All four quadrants, all four gem colors, pulsing in their slow breathing animations. Topaz warm yellow in the north. Emerald green in the east. Ruby red in the south. Diamond blue-white in the west.
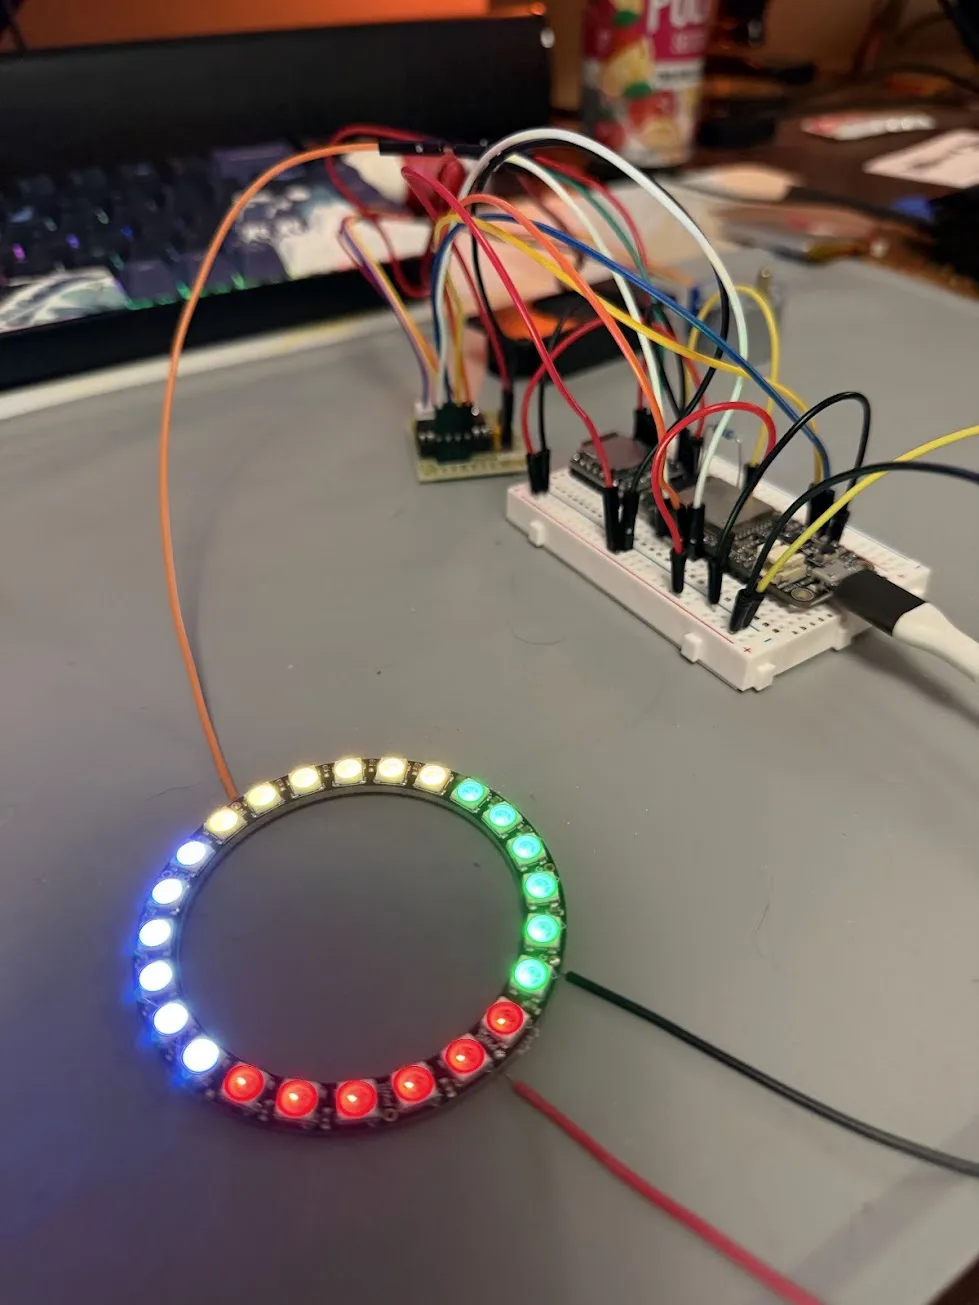
I said nothing for a second. It looked exactly like I’d been imagining for months.
The joints held. The data line was clean — all 24 pixels responded correctly, no flickering, no dead sections. First solder job.
The Full Stack
With the NeoPixel ring running, the complete electronics stack is now validated on a single bench:
| System | Status |
|---|---|
| Stepper motor | Seeking, erratic, lock-on modes working |
| NeoPixel ring | All four gem quadrants pulsing with correct colors |
| DFPlayer Mini + speaker | All five audio tracks triggering correctly |
| WiFi + HTTP server | ESP32 taking commands from Discord over WiFi |
| Chronicler bot | /compass, /spin, /lockon, /gem, /reset all working |
Every subsystem is running. The prop responds to Discord commands, moves a physical needle, lights up in four colors, and plays sound. On a breadboard with wires everywhere, but it works.
What a Good Joint Looks Like
For anyone else learning to solder: a good joint is shiny and volcano-shaped, tapering smoothly from the pad up to the wire. It reflects light cleanly. A cold joint — made by not heating the pad enough, or moving before it solidified — looks dull, gray, and sometimes grainy. Cold joints can pass continuity tests and still fail intermittently under vibration or temperature change.

If a joint looks dull, add a little fresh solder and reheat. The new flux will clean it up.
What’s Next
The electronics are done. What’s left is the housing — measuring the confirmed stack, designing the enclosure in TinkerCAD, and printing the body on the Bambu P2S and the resin face plate on the Elegoo Saturn 2.
The compass goes from breadboard prop to actual prop once it’s in a box. That’s the next session.
The Nokorode paste flux is sitting on the shelf. Maybe one day I’ll solder copper pipe. Probably not.